
NASA: A Quick Guide to Earth Explorer for Landsat 8 - Explained step by step - 10.05.13
Posted by Ricardo Marcenaro | Posted in NASA: A Quick Guide to Earth Explorer for Landsat 8 - Explained step by step - 10.05.13 | Posted on 12:03

A Quick Guide to Earth Explorer for Landsat 8
May 31st, 2013 by Robert Simmon
The Landsat Data
Continuity Mission is now Landsat 8, and that means images are now
public (woohoo!). NASA handed control of the satellite to the USGS
yesterday (May 30, 2013), and calibrated imagery is available through
the Earth Explorer. Unfortunately, the Earth Explorer interface is a bit of a pain, so I’ve put together a guide to make it easier.
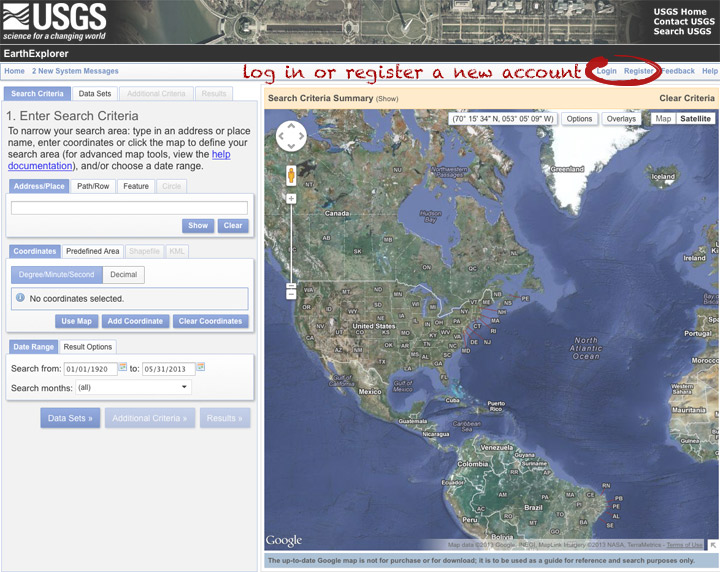
First, go to the Earth Explorer site: earthexplorer.usgs.gov
You can search, but not order data, without logging in—so register if
you don’t have an account (don’t worry, it’s instant and free), or log
in if you do.
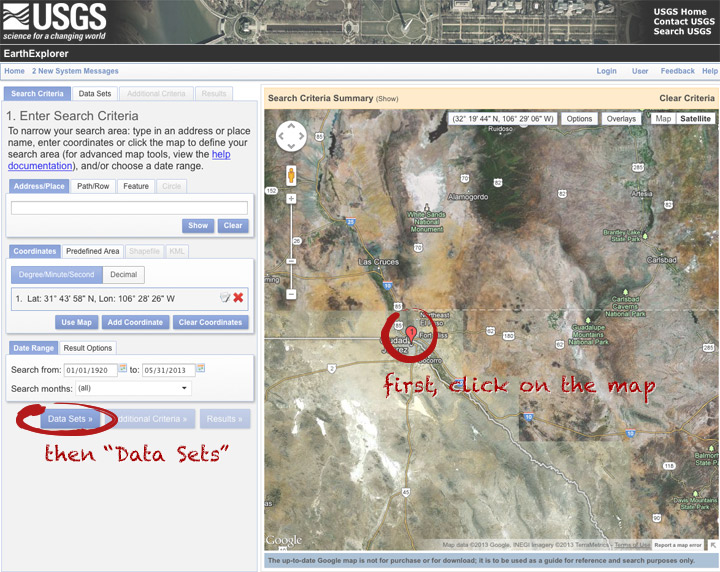
The simplest way to select a location is to simply pick a single
point on the map. You can define a box or even a polygon, but that makes
it more likely you’ll get images with only partial coverage. Navigate
to the location you’re interested in, and click to enter the
coordinates. You can choose a data range, but right now there are only 3
or 4 scenes for a given spot, so skip it and just click “Data Sets”.
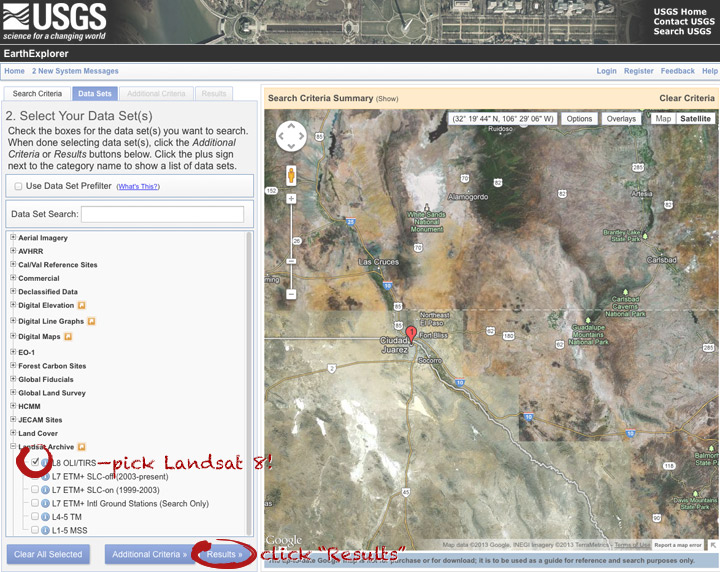
On the data sets page, you can search everything from Aerial Imagery to Vegetation Monitoring. Click the “+” symbol next to Landsat Archive, then the first check box that appears: “L8 OLI/TIRS” (which stands for Landsat 8 Operational Land Imager/Thermal Infrared Sensor (creative, no?)). Click “Results” to start a search.
After a short wait, you’ll get a list of available images. The
thumbnails aren’t big enough to show much, so click on one to see a
slightly larger image. Close that window, and click the download icon: a
green arrow pointing down towards a hard drive …

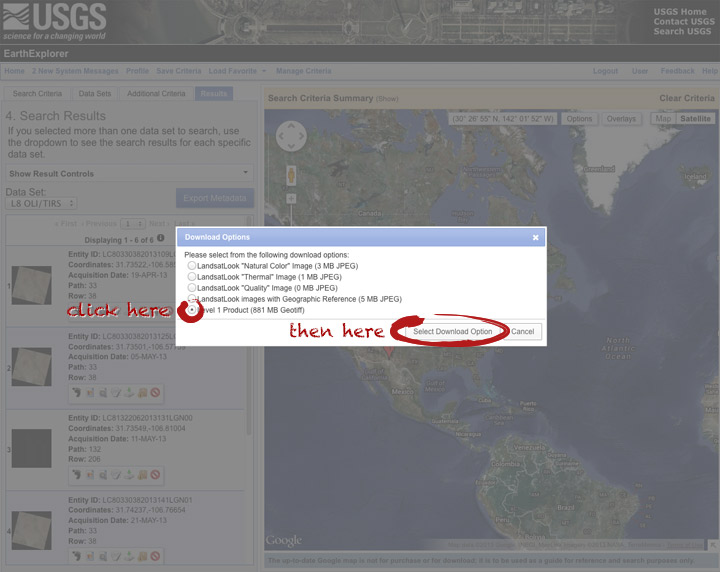
… which doesn’t actually download the data, just provides a list of
download options. “LandsatLook” are full-resolution JPEGs, and are a
quick way to check image quality (I’d prefer full-resolution browse
images without a separate download, but I digress). The Level 1 Product
is terrain-corrected, geolocated, calibrated data—a bundle of 16 bit,
single-channel GeoTIFFs. Select the “Level 1 Product” radio button, then click “Select Download Option”.
Done! Oh, wait. Not done. You need to click one more button: “Download”.
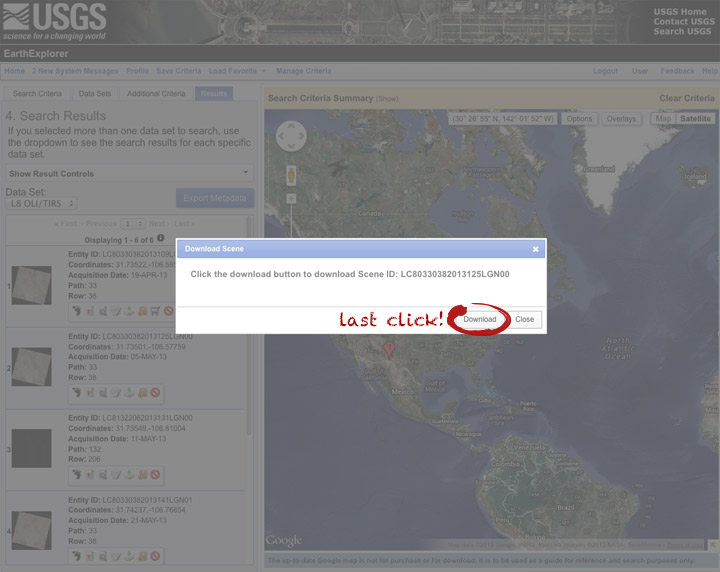
Now you’re done. The data should arrive in your browser’s designated download folder.
NASA: A Quick Guide to Earth Explorer for Landsat 8 - Explained step by step - 10.05.13
Ricardo M Marcenaro - Facebook
Blogs in operation of The Solitary Dog:
Solitary Dog Sculptor:
byricardomarcenaro.blogspot.com
Solitary Dog Sculptor I:
byricardomarcenaroi.blogspot.com/
Para:
comunicarse conmigo
comunicarse conmigo
marcenaroescultor@gmail.com
For:
contact me
For:
contact me
marcenaroescultor@gmail.com
My blogs are an open house to all cultures, religions and countries. Be a follower if you like it, with this action you are building a new culture of tolerance, open mind and heart for peace, love and human respect. Thanks :)
Mis blogs son una casa abierta a todas las culturas, religiones y países. Se un seguidor si quieres, con esta acción usted está construyendo una nueva cultura de la tolerancia, la mente y el corazón abiertos para la paz, el amor y el respeto humano. Gracias:)
(::)

Comments (0)
Publicar un comentario